Classic Bike Building

Page may contain affiliate links. Please see terms for details.
OP
OP
SquareDaff

SquareDaff

Über Member
Thanks to everyone for their help. Project refurb is now well underway. The frame now looks like this. Have done the forks too - but they were in the garage when this photo was taken. Now need to wait a few days for the lacquer to fully harden before I start putting it back together.

langsett-refurb.jpg
 

Dave Loasby

New Member
Location
Lincs
Very nice restoration. I stumbled across this looking for infomation as I have just been given My Uncles old Langsett frame and forks. It appears to be a 1960 build, and possibly a "competition 55 special" or something to do with the celebration of the 1955 Tour of Britain success. (It has different head and seat tube badges, that state 1st, 1955 Tour of Britain on them)
I am off to Langsett on Saturday to pick up a book.
Did you sort the decals yourself? I may be back pestering you for advice if you did.

Dave
 

steveindenmark

Legendary Member
I am enjoying this. It is great what you learn when doing jobs like this. Once you learn how to repair everything, clean it and assemble it, it makes the bike even more special.

Steve
 
OP
OP
SquareDaff

SquareDaff

Über Member
Very nice restoration. I stumbled across this looking for infomation as I have just been given My Uncles old Langsett frame and forks. It appears to be a 1960 build, and possibly a "competition 55 special" or something to do with the celebration of the 1955 Tour of Britain success. (It has different head and seat tube badges, that state 1st, 1955 Tour of Britain on them)
I am off to Langsett on Saturday to pick up a book.
Did you sort the decals yourself? I may be back pestering you for advice if you did.

Dave
Feel free to ask any questions you want Dave. If I know the answer I'm happy to help.
I've got the Langsett Book myself and the decals did change in 1955 due to the Tour of Britain as you suspected. There are also changes in the paint work from mine. I believe the seat tube 3 colour banding is replaced by a one colour band. I think the 1955 bikes had chromed shoulders on the forks too. There is a nice photo of the 1955 bike in the book so it should be easy to replicate the look. Also if you have the frame number then the book will also tell you the bikes original colour.

The decals on mine were created from scans from the book I then re-coloured and sharpened them using Paint Shop Pro. They were put on the bike using Inkjet Water transfer paper and then lacquer was applied over the top. Took a long time but they're well worth it for the overall effect.

Let me know how you get on with your project and, as I say, if you need some help/advice just send me a message and if I can help i will.
 
OP
OP
SquareDaff

SquareDaff

Über Member
I am enjoying this. It is great what you learn when doing jobs like this. Once you learn how to repair everything, clean it and assemble it, it makes the bike even more special.

Steve
I am enjoying doing this. Have cleaned most of the components now. At the moment I'm working on the front chain rings. So far I've done both brakes, the seatpost, both wheels and QR skewers, the handlebars, the stem, the rear deraileur, and the nearside crank arm. I've also stripped and regreased the bearings for the bottom bracket and the headset. Almost there now - just need to source some new cabling and clean up the front deraileur. Then once the lacquer has fully hardened I can start rebuilding!
 

Dave Loasby

New Member
Location
Lincs
Thats an offer i will no doubt take up at some point Thankyou. [URL=http://s1286.photobucket.com/albums/a602/Clairendave/?action=view&current=e305002a3eebdc4c5e26527303dbf97b_zps4c096b79.jpg] th_e305002a3eebdc4c5e26527303dbf97b_zps4c096b79.jpg [/URL]
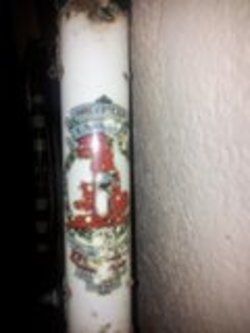
Thats a poor picture of the head badge. the seat tube has a similar cut down one too.
I am off to Langsett cycles on saturday to pick a copy of the book up.
I have been advised it was supplied in Lilac, but i cannot find any trace of a respray as yet.
Maybe time to show my femininity and refinish it in a nice light pink. :-)

Dave
 

Attachments

  • th_e305002a3eebdc4c5e26527303dbf97b_zps4c096b79.jpg
    th_e305002a3eebdc4c5e26527303dbf97b_zps4c096b79.jpg
    4 KB · Views: 19
OP
OP
SquareDaff

SquareDaff

Über Member
That transfer is in the book - so you should be able to reproduce it. It's specifically mentioned as being a Tour of Britain redesign.
TBH, if the respray has been done properly then you won't find any trace of lilic. I know when I've done mine I've stripped the bike back to the metal, applied a rust coat, a couple of layers of undercoat, then 3-4 layers of paint and at least 3 coats of lacquer. There's no trace of the gold it had been hand painted. I hope you like sanding ^_^

If you give me your frame number i can look it up and confirm the delivery colour for you.
 
Thanks to everyone for their help. Project refurb is now well underway. The frame now looks like this. Have done the forks too - but they were in the garage when this photo was taken. Now need to wait a few days for the lacquer to fully harden before I start putting it back together.

View attachment 35775
Absolutely stunning job :bravo:I would love to do a restoration myself when funds allow
 
OP
OP
SquareDaff

SquareDaff

Über Member
I need some "technical terminology" advice please? One of my centre pull brakes has a rusty bit of wire between the two caliper arms. I'd like to replace it but don't know what it's part name would be. Essentially it's a bit of brake cable with two metal nodules on either end to fit into the holes on the caliper. It's about 8cm long. Anyone know what it's called?
 
Top Bottom