Ah, I'm not aware of any videos that show this operation. It's really straightforward though so I'll attempt to talk you through it:
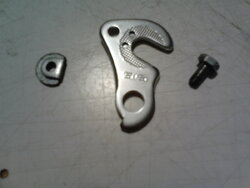
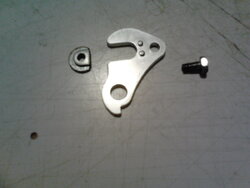
Firstly here are another couple of photos which show the component parts of the derailleur clamp:


In the photos above the parts are: the shaped nut (left) the derailleur hanger (middle) and the bolt that holds the two together.
Take the wheel off the bike to start with then offer up the shaped nut on the inside of the dropout (the slot the wheel axle fits into). You'll see that the shape of the nut allows it to fit snugly into the curve at the end of the dropout.
Now offer up the derailleur to the other side. As shown in the right hand photo this clamp has a couple of pegs that slot into the dropout to help locate the hanger in the correct position. Next, put the bolt through the small hole in the hanger, screw it into the nut and tighten up (needs to be secure but not massively tight) making sure that the nut is still snugly in its position at the end of the dropout.
Refit the wheel. On the drive side the axle will locate in the hanger and the non-drive side will be roughly halfway along its dropout. Make sure the wheel is in line with the bike (you'll probably find there is a hole in the bridge between the chain stays which you can line up the centre of the tyre with) and tighten up.
If you haven't twiddled any of the adjusters while the derailleur was off, the gear indexing should be okay. If it isn't the video posted by
@Racing roadkill should see you right.
I hope that helps. Give us a shout if you have difficulty.


 to the site.

